Task 5 - 3D Printing Test (Group Task)
- EmadMaximos
- Sep 29, 2018
- 5 min read
Updated: Nov 12, 2018

Task Objective
The main objective of this group task was to find methods to test a 3D printer to check its capabilities, performance, and efficiency in printing in order to better understand the concept of 3D printing. The 3D printer we worked on was Ultimaker 2 Extended + and we worked as a team of four members.
Introduction to 3D Printing
3D printing is an Additive Manufacturing technique used to create a model, prototype or any object that can be used in different aspects of life. An additive manufacturing process is a process where 3D objects are constructed by adding successive layers of material on top of each other to create the overall geometry and shape of these objects.
More about the Ultimaker 2 Extended +
Ultimaker 2 Extended + is a Cartesian - type 3D printer, where the extruder translates in the X-Y plane while the bed is leveled upwards or downwards along the Z direction, that is engineered to perform. It is reliable, efficient, and user-friendly. Thanks to its support of a wide range of materials (PLA, ABS, CPE, CPE+, PC, Nylon, TPU 95A), making it considerably suitable for a huge variety of applications from prototypes to customized tools. It is a great all-around 3D printer that delivers consistent results.

Steps of the testing process of the Ultimaker
At first, we went through different ideas to test the printer including:
Looking up the printer's specifications and printing properties on the website for Ultimaker. (Website's link: https://ultimaker.com/en/products/ultimaker-2-plus/specifications)
Going through the printer's user manual to understand how it works and what can be the best method for testing.
However, we did further researching which led us to "FabAcademy" website where we found one of the members who tested an Ultimaker 3D printer and did so using a specific test file of a complex design that is small in size and containing various geometries. Also, he did this test several times with different print qualities (low, normal, and high). Therefore, we decided to go this route and downloaded all the required files to start testing.
The testing process of the 3D printer was divided into three main steps: (a) Preparing the test file on "Ultimaker Cura", (b) 3D Printing the design, and (c) Comparing between the 3D printed design and test file parameters.
a) Preparing the test file on "Ultimaker Cura":
After we downloaded the test file, which had a ".stl" extension, we had to work with it on a slicer supported by Ultimaker called "Ultimaker Cura 3.4.1" that converts the extension of the file from ".stl" to ".gcode" so that the file is converted to a gcode file which is placed on an SD Card and read by the 3D printer to execute the design. The steps of handling with the test file on Cura were as follows:
1. Open "Ultimaker Cura 3.4.1".

2. Open the chosen file by clicking "File", choose "Open File(s)", navigate for your test file (.stl), and click "Open" as shown in the following figures.


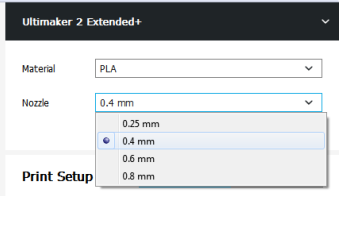
3. After importing the file to Cura, choose the printer model to be "Ultimaker 2 Extended +", choose the material to be "PLA", and choose the nozzle width to be "0.4 mm" which is the default width as shown in the figures below.
4. In the "Print Setup" part keep the Recommended Settings with layer height equal to 0.1 and infill percentage equal to 20% as shown below. (Note: Do not click "Generate Support" as this a test part that shouldn't be printed with supports!)

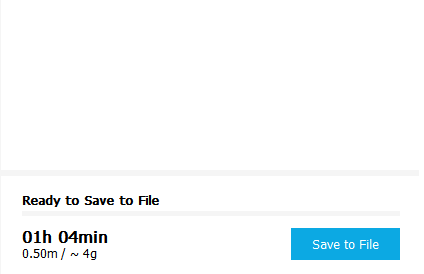
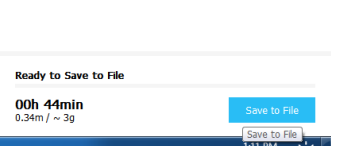
5. To start slicing the file (converting it to gcode), click "Prepare" to get the design sliced and ready to print, it will also give you the printing time and the resultant weight of the printed part as shown in these figures.
6. After the slicing is done, you can choose Layer View, shown in the figures below, to see how the printer will build the part. As in this view you have tick boxes to show the infill, shell, helpers/ supports, travels, and detailed layers along with the top and bottom layers too. You can change anything if you want, by ticking or unticking the respective boxes, to see more details or to reduce the quality to print faster.

7. After you are done, click "Save to File" and save the design file with .gcode extension in the place you want.
b) 3D Printing the design:
As stated before, the printer we used was "Ultimaker 2 Extended +" and the material used for printing was "PLA" abbreviated for Polylactic Acid which is a plastic-type material that has many uses in the digital fabrication field, especially 3D printing, in addition to being non-biodegradable making it harmless for human usage. The steps of printing the design included the following:
1. Upload the gcode extension file on the SD card of the printer, shown in the following figure, and insert the card inside the printer.
2. Press "Print" and choose the file to be printed from the list that appears on the small screen at the bottom of the printer. We choose our file "test1" then the printer will start printing automatically as shown in the figures below.
This video shows how to "Find" and "Print" your design:
3. Wait for the printer to heat up the bed and extruder to their set temperature, which is detected by a heat sensor prior to printing, as shown in the figure.

4. Once heating is done, the bed is leveled up in the z direction through a leveling screw and printing commences. We waited and kept close watch on the part while being printed, to handle and troubleshoot any problem that might occur, and took photos for different phases of the printing process as shown in the following figures.
And here is a time-lapse video showing the test part while being printed:
5. When printing finishes, the bed levels down again and starts cooling. Wait for the cooling process, and then you are ready to receive your part as shown in figures.
6. Finally, use the printing tools to remove the base raft and supports, if there is any, and you have your final cleaned up part as shown. :D


c) Comparing between the 3D printed design and test file parameters:
In this part, we compared between the printed out design and the test file by accurately measuring different dimensions on the printed part using a "Vernier Caliper", as shown in the figure below, and previously knowing the dimensions and parameters of the test file.

Using this table below, taken from the member in "FabAcademy" who carried out this test before, we were able to compare between the test file parameters and the test result of the part printed on Ultimaker 2 Extended +.

Conclusion
The process of printing a certain design to test the printing performance and efficiency of a 3D printer was very interesting and informative too as we got to work as a team to know more about 3D printing including its tips, techniques, and issues. We also learned how to set and prepare any design file on the slicer "Ultimaker Cura" and most importantly how to work with the amazing Ultimaker printer to print anything we want! So come visit us at FLiNC (FabLab in New Cairo) and may be we can tell you everything you need to know about 3D printing and help you design and print something you like. :D
References
For more information and details about 3D printing tests and the tips and tricks you need to know. Please visit this FabAcademy member's website which helped us a lot in our own test.


Comments